Sunday, February 10, 2013

Pineapple Jelly Made from Scraps

Making Pineapple Jelly is so easy using the cores and scraps from your fresh pineapples.  Just follow these simple steps and you're on your way to a great tasting jelly.


Ingredients for Sure Jel
4 cups of pineapple juice made from the scraps
5 1/2 cups of sugar
2 tbsp of lemon juice
1 box of regular pectin
1 thin pat of butter

Yields about 7 half pint jars

Ingredients if use Ball Classic Pectin
6 cups pineapple juice
1/4 cup lemon juice
6 3/4 cups of sugar
8 tbsp of Ball Classic Pectin
1 thin pat of butter 

Yields 9 half pint jars

Take all of your pineapple cores and scraps and put them in a large stainless steel pot.


Add just enough water to cover them and bring to a boil.  Let them cool and then set in the refrigerator for at least 24 hours.  I let mine sit for several days. 
When ready to make your jelly, take out and bring back to a boil.  Strain juice through a cheese cloth or something similar.  I used a metal strainer and a cotten cloth. 


Measure out your sugar in a larger bowl and set aside.  Mix your pectin with about 1/4 cup of sugar taken from what you already have measured out. 
Put juice, butter, lemon juice and pectin in a large pot over medium/high heat and bring to boil that can't be stirred down.
Add your sugar all at once and bring back to a boil.  Boil for exactly one minute.
Skim foam if needed and ladle into clean, sterile jars leaving 1/4 inch head space.
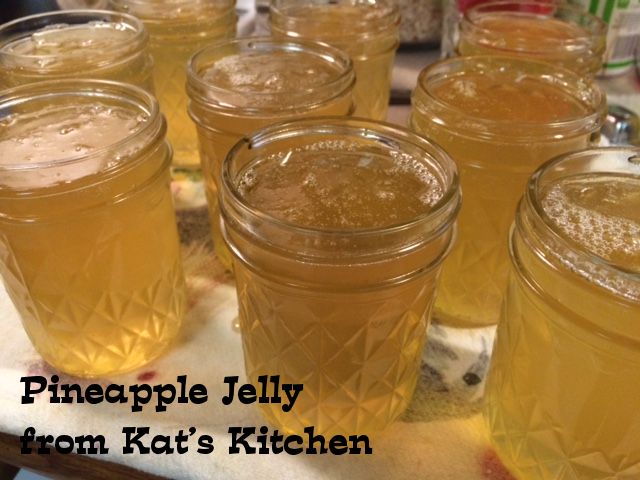


Wipe the rims of your jars with a paper towel dipped in vinegar to make sure you get a good seal.  Put on lids and rings and tighten down finger tight.
Place in a boiling water bath and process for 10 minutes.

Remove lid and wait 5 minutes.  Place on counter to cool for 24 hours.  Label and Store.


Sunday, February 3, 2013

Crushed Pineapple

I found pineapples on sale for $1.99 and thought I would do a few jars of Crushed Pineapple in their own juice.  No sugar added..Pineapple upside down cake is one of my family favorites so these will do great for that.  Here's how I did them.
You will need:
Fresh Pineapples
Canning Supplies
Cut the top and bottom from your pineapple using a sharp serated knife.  Discard these.

Slice the skins from the pineapple staying as close as you can to not waste any of the fruit. 

Now you need to cut out any little left over eyes or brown spots.  Save these trimmings to make jelly with later.

Cut your pineapple into 4 sections and stand on end to cut out the core.  Put core with other trimmings for your jelly.


You should now have a nice bowl of pineapple. 


Cut the pineapple into chunks and use a food processor to chop up.  Put in a stainless steel pot and simmer for 10 minutes. 


Ladle hot pineapple into clean, sterilized jars leaving 1/2 inch headspace.  Remove air bubbles and adjust headspace if needed.  Put on lids and rings, tighten down finger tight. 


Process in a water bath canner.
15 minutes for pints or 1/2 pints
20 minutes for quarts


Remove lid from canner and let set for 5 more minutes.  Place on counter to cool for 24 hours.  Lable and Store in a cool, dark place.

To make jelly from the trimmings and core.  You cover with water and bring to a boil.  Let cool and then set in refrigerator for at least 24 hours.  Bring back to a boil and strain through a cheese cloth to collect juice for jelly.
Make jelly as usual.
 Here's the link for how to make the jelly.


Monday, January 21, 2013

Steak Stir Fry

This is not a canning recipe, but thought I would post a few of my favorite recipes to share with all of you.  My hubby and I love Steak Stir Fry. 

Photos in this post are from various times I've made this.  If I don't have one ingredient, I may throw in something else.  That is what makes stir fry fun.  You can put whatever kind of veggies you like in it.


Ingredients you will need
Yields 3 to 4 large servings
1 pound more or less of stir fry beef or you can cut your own into strips.  Use a little more if you like a lot of meat.
1 large green pepper
1 large yellow, red or orange pepper
1 large onion
6 green onions
1 cup of beef broth made with water & 3 bouillon cubes
(If you want to wait use a little more water in your meat and then use it to make your broth)
If you make and can your own beef broth, it works great
1/2 cup of soy sauce
1/2 cup of water
2 tbsp of corn starch
1/4 cup of olive oil or canola oil
1 clove of minced garlic
1/2 tsp of ginger
Fresh ground black pepper
1 tbsp garlic salt
Precooked warm rice (I love my rice cooker for this)

1:  If you have a rice cooker go ahead and put your rice on to cook first.  I cook 3 measures of rice in my cooker.  That's roughly about 1 1/2 cups of uncooked rice.
2:  Put your steak in a pressure cooker and add garlic salt. Pour about 1 1/2 cups of water over this and pressure cook for 15 to 20 minutes.
3:  While the rice and steak are cooking get everything else ready.
4:  In a bowl mix your beef broth, water, soy sauce and corn starch.  If you like less gravy in your stir fry you can make only 1/2 the broth mixture.  Set this aside to use later. 
5:  Cut your pepper into strips and slice your onion into slices. 


6:  Cut your green onions into pieces like this..


7:  In a large skillet or wok put 1/4 cup olive oil or canola oil.  Heat until hot.  Add your garlic, ginger and fresh black pepper and stir for a minute or two.

8:  Add your peppers and sliced onions to the skillet and stir fry for about 5 minutes or until fairly tender. 


9:  Add your pre-cooked steak, green onions and broth mixture.  Stir fry for a few minutes until the broth starts to thicken. 
This batch I made more broth than usual.  You can use as much or as little as suits you.


  Serve over hot white rice.


Saturday, January 19, 2013

Pineapple Chunks

There is nothing quite like eating fresh pineapple.  

So watch the sales and when you find a good price, run out and buy some.  You won't regret it.

Turn These

Into This


Ingredients:
Fresh Pineapples
Sugar
Water
Put your clean jars in the canner and boil to sterilize them while you are cutting up your pineapples.  Since you are processing for 15 minutes, you can just wash them and keep them warm.
First I peeled the pineapples with a sharp knife.  Making sure to cut the eyes out good. 

I then quartered them and removed the core.
Or you can use a pineapple corer.  I have done both.
Next I cut my pineapple up into chucks.


I made a syrup using 4 cups of sugar and 12 cups of water.  You can make your syrup as light or heavy as you like. Heat your syrup to boiling and add your pineapple.

Then added my chunks of pineapple to the pot and simmered for 10 minutes.

Then I filled my jars leaving 1/2 inch head space.
Next I covered the pineapples with the syrup, removed air bubbles and adjusted the head space to 1/2 inch.


The only thing left to do is wipe the rims of the jars real good to make sure they are not sticky.  I then put on my lids and rings, tighten them down finger tight.  I place my jars in the canner and brought it to a boil, then processed them for 15 minutes. 

Pints go for 15 minutes or Quarts for 20 minutes.

Next I placed the jars on the counter to cool for 24 hours to be labeled and stored for when I get a craving for good pineapples.


Sunday, December 23, 2012

Peanut Butter Balls

I've been making candy for Christmas and you just can't be done until you make some "Peanut Butter Balls"....these are so simple to make and yummy to eat. 

You will need:

1-16oz box of powdered sugar
1-18oz jar of Jif smooth peanut butter
1/4 cup of milk
1 stick of butter
1/2 cake of wax
1 package of semi sweet chocolate

Melt your butter in large bowl.  Add sugar, peanut butter and milk.  Mix well.  Roll into 1 inch size ball and set on a cookie sheet lined with wax paper.  Put in the refrigerator to chill for 30 minutes.

 
While they are chilling you grate your wax (I use Gulf Canning Wax) There are probably better ones to use, but not readily available in my area.  You need your chocolate to get thin enough to dip the candy and give you a pretty shine, the wax helps do this. 
Put wax in a double boiler and start it melting.  When the wax has melted add your chocolate and once it has melted you are ready to dip the candy.  I tilt my kettle to make dipping easier.  like this..

Using toothpicks, Pick up each peanut butter ball and dip it in the chocolate, then set it on a pan lined with wax paper.  Repeat this until all candy has been dipped.  Set these in the refrigerator to chill for about 30 minutes.
 
Once they are chilled well, remove toothpicks, put them in a container and store in the refrigerator.  Fun to make and more fun to eat.  Merry Christmas everyone!


Wednesday, December 5, 2012

Venison

My pastor gave me FREE deer meat so I am sitting here listening to my canner jingle.  Thought I would post how I did it while waiting for the timer. 
The first thing you need to decide is do I want to Hot Pack or Raw Pack my meat..Below is a little information to help you decide.
****************************************
Hot Pack Method vs Raw Pack Method
 Venison is a low-acid food and must be processed in a pressure canner. You can add salt for flavor but it is not necessary for preservation of the meat. You can use either the Raw Pack or Hot Pack.  I prefer the Hot Pack method.  Raw packing it is faster, but when finished processing the jar may only be partially full of liquid, leaving some of the meat uncovered. Raw packing also leaves some air in the jars and can cause meat to darken during storage. Hot pack does take longer, but has benefits.

1: You can fit more meat in the jar.
2: You can remove more air from the jar.
3: You have less liquid loss, which gives you better quality.


Reference 


 ***************************************************

My son cut the meat into cubes for me.  I washed it several times in cool water. 
Next I put it in a container of salt water and stuck it in the refrigerator.  I let it sit in salt water for two days, changing the water several times.  This will get rid of the gamey taste that some people don't like as well as draw out alot of blood from the meat.

As you can see where I am pointing in the picture.  I will cut away a little more of the fatty tissue before canning.

Got my meat all washed up and ready to start canning it.  I like using the hot pack method for my meat.  Many people raw pack and that is ok, this is just how I do it. 

I put all the meat in a large stainless steel pot.  Cut up a big onion and threw that in.  Ground some fresh black pepper on that.


I brought this to a boil and boiled gently for about 30 minutes.  I dipped all the froth from the pot as it began to boil.  While the meat was cooking I washed my jars and got everything ready.
I put a clove of fresh garlic and a chunk of onion in the bottom of each jar.  Then I filled the jars with meat and the onion it cooked with using a slotted spoon. I didn't fill them quite full so that I would have plenty of broth. I added a tsp of canning salt to each jar.

I covered the meat with beef broth made from bouillon and left one inch head space.  If you have fresh beef broth, then by all means use it. 


I removed all the air bubbles and adjusted my head space.  Then put on my lids and rings.  I tightened them down finger tight and put the jars in the canner.


I put on my lid and vented my steam for 7 minutes for the All American canner.  Most vent for 10 minutes.  I then processed for 90 minutes.  If doing pints you would process for 75 minutes.  I let the pressure drop naturally and waited 10 more minutes and then  removed my lid.  I  waited 10 more minutes to allow the jars to adjust to the room's temperature.
Placed the jars on my counter to cool for 24 hours before storing.

Adjust for your elevation


If you decide to Raw Pack your meat.  Add onions or any seasonings you want to the jar.  Then pack the meat into the jars leaving 1 inch headspace.  Add 1 tsp of canning salt.  DO NOT ADD ANY LIQUID, it will produce it's own.  Process the same as Hot Pack.


Pecan Pie

I made Pecan Pie for our Church Christmas party...it was delicious!  Really good with a little melted caramel poured over the top!
  • 1 cup Corn Syrup
  • 3 eggs
  • 1 cup sugar
  • 2 tablespoons butter, melted
  • 1 teaspoon Pure Vanilla Extract
  • 1-1/2 cups (6 ounces) pecans
  • 1 (9-inch) unbaked or frozen** deep-dish pie crust

  1. Preheat oven to 350°F.
  2. Mix corn syrup, eggs, sugar, butter and vanilla using a spoon. Stir in pecans. Pour filling into pie crust.
  3. Bake on center rack of oven for 60 to 70 minutes (see tips for doneness, below). Cool for 2 hours on wire rack before serving.
  4. **To use prepared frozen pie crust: Place cookie sheet in oven and preheat oven as directed. Pour filling into frozen crust and bake on preheated cookie sheet.
  5. RECIPE TIPS: Pie is done when center reaches 200°F. Tap center surface of pie lightly - it should spring back when done. For easy clean up, spray pie pan with cooking spray before placing pie crust in pan. If pie crust is overbrowning, cover edges with foil.
  6. NUTRITION TIP: To reduce calories, substitute Lite Corn Syrup for the Regular Corn Syrup.
  7. High Altitude Adjustments: Reduce sugar to 2/3 cup and increase butter to 3 tablespoons. Reduce oven temperature to 325°F.
VARIATION: coarsely chopped walnuts may be substituted for pecans to make a walnut pie.